起
X520 或者说是 82599ES 应该是用的比较多的一种光纤网卡了,特别是有很多 R86s 用户会选择把上面的 MLX 网卡换成 X520 OCP,但 X520 是有很多马甲和 OEM 厂商卡存在的,有些卡会启用强制 SFP 认证,这种情况下就会出现插入了猫棒结果驱动程序报“不兼容的光模块”的问题。如果你只想知道如何解锁,点击这里查看解锁步骤 或者 点击这里使用一键解锁脚本。
为什么
我们以 Linux 上驱动 ixgbe 举例。定位到驱动程序的 ixgbe_phy.c 文件。
有如下代码段
hw->mac.ops.get_device_caps(hw, &enforce_sfp);
if (!(enforce_sfp & IXGBE_DEVICE_CAPS_ALLOW_ANY_SFP) &&
    !(hw->phy.sfp_type == ixgbe_sfp_type_1g_cu_core0 ||
        hw->phy.sfp_type == ixgbe_sfp_type_1g_cu_core1 ||
        hw->phy.sfp_type == ixgbe_sfp_type_1g_lx_core0 ||
        hw->phy.sfp_type == ixgbe_sfp_type_1g_lx_core1 ||
        hw->phy.sfp_type == ixgbe_sfp_type_1g_sx_core0 ||
        hw->phy.sfp_type == ixgbe_sfp_type_1g_sx_core1)) {
    /* Make sure we're a supported PHY type */
    if (hw->phy.type == ixgbe_phy_sfp_intel)
        return 0;
    if (hw->allow_unsupported_sfp) {
        e_warn(drv, "WARNING: Intel (R) Network Connections are quality tested using Intel (R) Ethernet Optics.  Using untested modules is not supported and may cause unstable operation or damage to the module or the adapter.  Intel Corporation is not responsible for any harm caused by using untested modules.\n");
        return 0;
    }
    hw_dbg(hw, "SFP+ module not supported\n");
    hw->phy.type = ixgbe_phy_sfp_unsupported;
    return IXGBE_ERR_SFP_NOT_SUPPORTED;
}
这里就是驱动程序进行 SFP 认证的地方,这里可以看到 ixgbe 驱动会根据 get_device_caps 查询是否进行 enforce_sfp 认证,同时也由 IXGBE_DEVICE_CAPS_ALLOW_ANY_SFP 和下面的 allow_unsupported_sfp 决定是否跳过认证。
这里也就是为什么 modprobe ixgbe allow_unsupported_sfp=1 或者在 grub 上设置 ixgbe.allow_unsupported_sfp=1 也可以起作用。
当然一劳永逸的修改方法则是修改 x520 的 EEPROM,彻底解锁。
解锁
只需要更改 x520 EEPROM 中的 0x0058 的一位就可以进行解锁了。
这里需要用到 ethtool。
- 首先,使用
ip link命令找到你的网卡。注意: 网卡必须没有被直通到其他虚拟机中! 这里假定网卡叫做enp5s0f1。 - 运行
ethtool -e enp5s0f1 offset 0x58 length 1,查询网卡的 EEPROM。
这里会出现一个这样的返回
Offset Values
------ ------
0x0058: fd
记下这里的 fd 你可能是其他值。
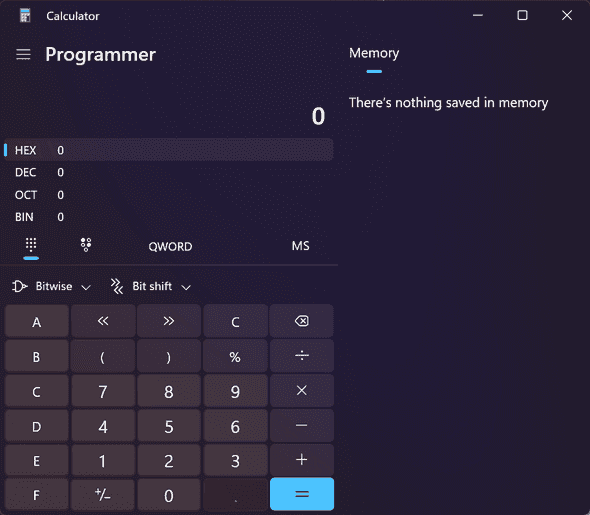
- 打开 Windows 的计算器
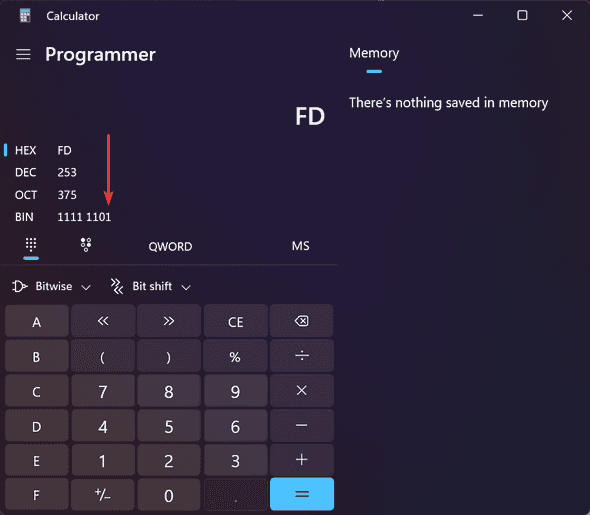
在左侧侧边栏菜单中选择“程序员”,点击左侧的 HEX 行让蓝色标志出现在 HEX 文字左侧。

输入 fd,查看这里的最后一位,如果它是 1 则是无限制的,0 则是有限制的。

如果是 1 则无需任何操作。如果是 0 则继续解锁。记下 BIN 的值
- 清空计算结果,点击计算器的 BIN 行,输入你刚刚记下的 BIN 值然后,在最后的 0 那一位输入时输入 1。例如,你刚刚看到的是
1111 1100则输入1111 1101。然后记下 HEX 行的返回值,在这里是fd记下这个值。 - 输入以下命令查询网卡信息
cat /sys/class/net/enp5s0f1/device/vendor
cat /sys/class/net/enp5s0f1/device/device
第一行应当输出 0x8086,第二行应当输出 0x10fb 或者 0x154d。如果不是这些值请不要继续操作!
- 修改 EEPROM
输入以下命令,其中
0x10fb8086取决于你在上一步中device输出的值,如果它是0x10fb则是0x10fb8086,如果它是0x154d则是0x154d8086。后面 value 的值0xfd则是刚刚计算器计算出来的值前面加上0x。
ethtool -E enp5s0f1 magic 0x10fb8086 offset 0x58 value 0xfd length 1完成后重新启动电脑即可。
一键脚本
- 首先,使用
ip link命令找到你的网卡。注意: 网卡必须没有被直通到其他虚拟机中! 这里假定网卡叫做enp5s0f1。 - 选择下面命令之一运行
# Cloudflare Pages 提供
curl https://unlock-x520-sfp.utilapi.bid/unlock.sh | bash -s -- enp5s0f1
# 原始 Github
curl https://raw.githubusercontent.com/cubesky/unlock_x520_sfp/master/unlock.sh | bash -s -- enp5s0f1
# 国内加速可以用这个
curl https://ghproxy.com/https://raw.githubusercontent.com/cubesky/unlock_x520_sfp/master/unlock.sh | bash -s -- enp5s0f1
如果显示 Card is unlocked. 则您的卡本身就没有锁。
如果显示 Unlocking... 并提示 Reboot the machine for changes to take effect... 则是完成解锁步骤,重启后生效。
